Carry 101: My Essential Car Camping Gear
Winter has been rough here in the northern hemisphere and I for one am itching for warmer temperatures and hopefully some sun. If you haven’t already, there’s no better time to dust off your party equipment than spring. Use this rundown to make sure you’re ready to roll when adventure calls.
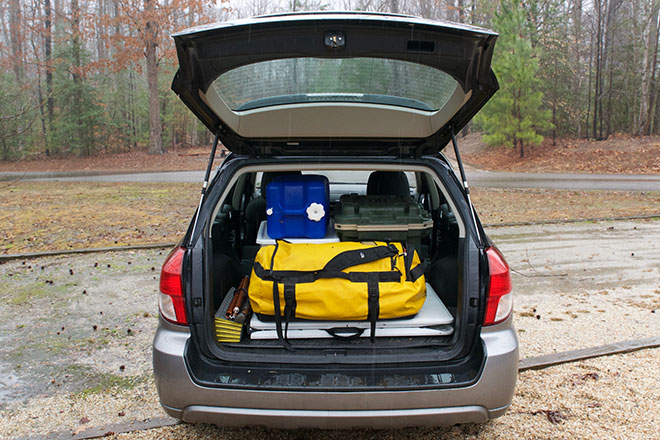
Coming from a backpacking discipline, car camping requires you take more or less the same stuff, but with one exception—you don’t have to carry it, so weight and bulk are an afterthought. Since you’re just tossing everything in your car, we recommend you use a bin and bag system to keep everything compartmentalized and easily accessible.
For easy of readability, let’s break it down into four categories of gear:
- – Sleep system
- – Shelter
- – Kitchen stuff
- – Food and water storage
You can obviously break that down a little further, but there’s really no need to complicate this.
Sleep System
- Sleeping bag: The North Face Blue Kazoo
- Sleeping pad: Sea to Summit Comfort Plus Insulated & Therm-a-Rest Z Lite
- Cot?
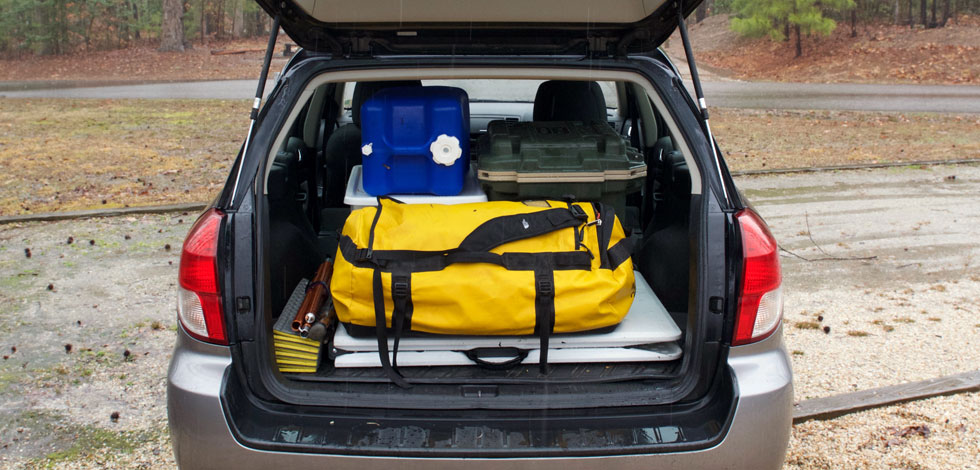
- Car: Subaru Outback
- Tarp: BearPaw Wilderness Designs 10’x10′ Flat Tarp
- Tent/Hammock: Hyperlite Mountain Gear UltaMid 4
-
- Work Station: Simple folding table
- Stove: MSR Whisperlite International
- Kitchen Wares: GSI Outdoors
-
-
- Cooler: Pelican 30 Quart Elite
- Water Container: Reliance Aqua-Tainer 7 gallon
-
Just the same as backpacking, you’re going to want to be cozy, so a pad and a bag are your minimum. No need to worry about weight or bulk here since you don’t have to carry anything. I’ve really wanted to up my game with a Helinox Cot Lite, but just never popped on one.My bag is a hobbling TNF mid-grade down bag rated to 15 degrees Fahrenheit. I won’t get into down vs. synthetic bags here, but I think I’m sold on that 15/20 degree rating because it lets you stretch it to 0 if you absolutely have to, it’s a cozy dream at the freezing mark, and it’s not unbearable at 45/50. I’ll be upgrading soon to a Feathered Friends Flicker 20 degree to add a little more versatility to my setup.
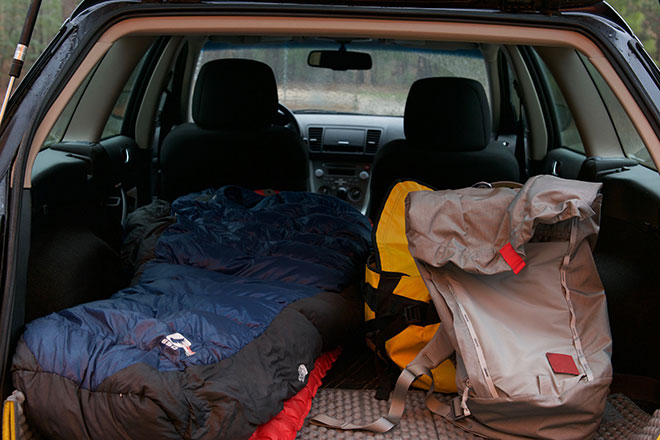
Sleeping Pads? Listen up. Do not skimp on your pad. If you splurge financially on anything, do it on your pad—especially for car camping. Two favorites right now? Well again I’m a backpacker, so the Therm-a-Rest NeoAir Xtherm is still the reigning champ, but I occasionally use the Sea to Summit Comfort Plus Insulated pictured here—it’s a lot faster to inflate. Also really interested to try a Big Agnes Insulated AXL Air for three-season use. For car camping though, you should go nuts and pack the inflatable mattress your college buddy keeps in his trunk, just make sure your campsite has an electric hookup and that it’ll fit in your shelter.
“Do not skimp on your pad. If you splurge financially on anything, do it on your pad—especially for car camping.”
Other stuff to consider?
I really like the Sea to Summit Aeros pillows. If it’s going to be cold, a pair of booties is also a welcome comfort. All this stuff goes into the designated gear duffel or bin—I like The North Face Base Camp Duffels for this kind of job.
Shelter
Depending on the weather and the campsite, you’ll have a few options to choose from for your primary shelter. For this example, your “primary” campsite is what you’ll sleep in—I’m set up solo in my car, but I have a HMG UltaMid 4 in my duffel if I’m camping with a group. The UltaMid 4 for me is a love/hate relationship. Space to weight? It’s one of the best. It’s just so big, I hardly have excuses to use it. Further, it does not pack as small as I thought it would. Even though it weighs just over a pound, it still takes up too much volume for me to justify on most outings. But I’m a gear snob—any free-standing tent will work for developed campsites. I still recommend you buy a decent brand for warranty and quality, but there’s no reason to spend over $200 if you’re new to it and want to try something out.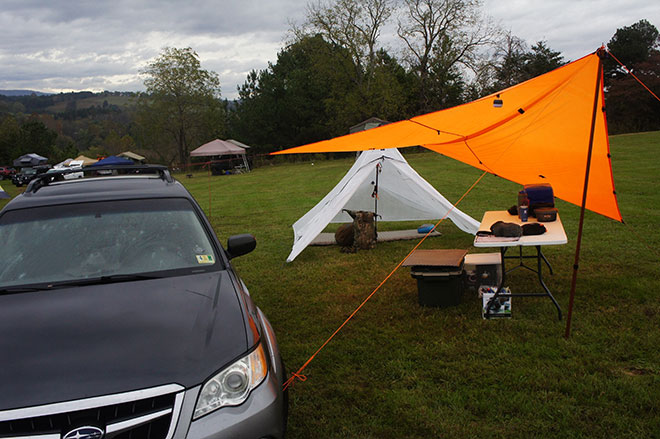
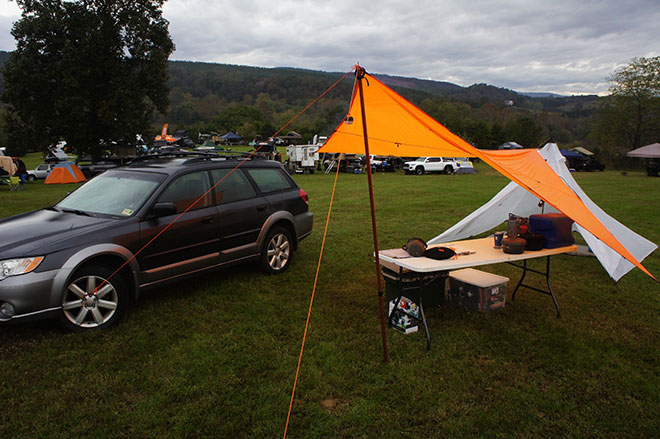
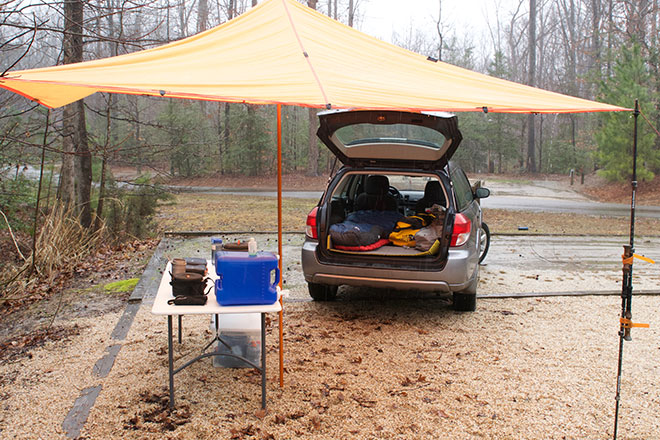
I also really recommend learning how to pitch a large flat tarp effectively. As you can see, I’ve pitched one over my kitchen bumping right up to the hatch of the car, providing seamless protection from sleep site to work space. My tarp is one of my top three favorite pieces of gear of all time. Seriously, you should get one.
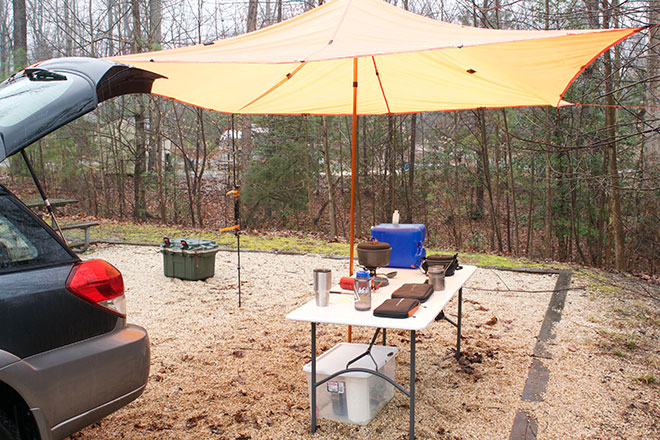
Campsites themselves vary—this one is a 20’x20′ fine gravel—not ideal for driving tent stakes into the ground. I’ve also slept on elevated wood platforms—also less than ideal. Just something to keep in mind when making reservations.
“I really recommend learning how to pitch a large flat tarp effectively. I’ve pitched one over my kitchen bumping right up to the hatch of the car, providing seamless protection from sleep site to work space.”
Other stuff to consider?
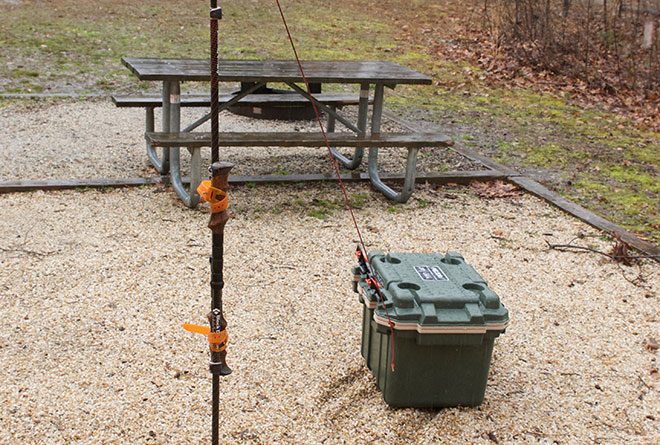
You’ll notice I’ve got two poles holding up my tarp and I wouldn’t have been able to rig this setup without them. The taller center pole is an 8′ adjustable tarp pole from REI. It’s not something I’d carry into the backcountry, but for car trips it’s a no-brainer. The other pole is rigged up from some trekking poles and Black Diamond’s silicone gear straps. Super useful for lashing long items to a pack, A-frame carry of skis, or for creating a rigid long pole from two trekking poles. I use them to create a support pole for my UltaMid 4, but they came in handy big time here too.
I picked up a Black Diamond Moji lantern years ago and have been using it for a while—probably not the brightest product out there, but I paid 20 bucks for it years ago and it’s seen a lot of action. Don’t forget extra batteries for all your electronics.
All of the above can go into the duffel/bin with your sleep system if it’ll fit. Basically, all soft goods and gear are in one place.
Kitchen Stuff
Camp cooking is a niche of its own now. You can really do some incredible stuff with the outdoor cooking equipment on the market these days. I’m still a backpacker at heart, so I’m just using a single burner MSR Whisperlite International as my stove and a GSI Outdoors Pinnacle Backpacker kit.The Pinnacle Backpacker set is a fully contained cookware set and nests into the largest pot in the set. It comes fully loaded with two pots, one pan, four cups, four plates, and two silicon lids and a pot grabber. If you travel in groups frequently or are planning a major road trip, this is definitely worth consideration.
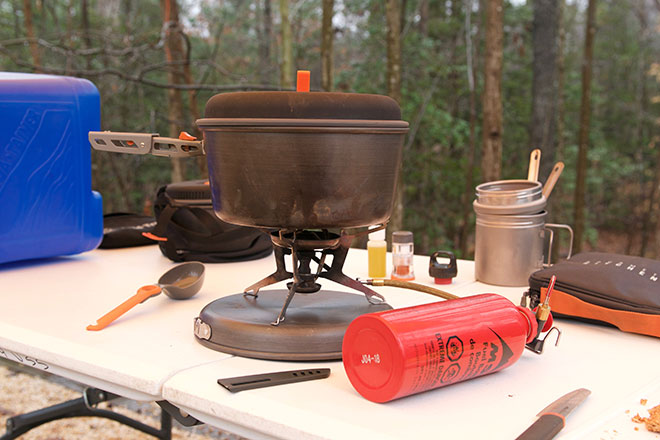
GSI has also really dialed in their completing gear for outdoor living—the Pinnacle Backpacker works hand in hand with the Gourmet Kitchen Set 11 and the Santoku Knife Set. The Kitchen Set features three additional utensils and creature comforts like a salt and pepper shaker, two liquid containers, small cutting board and a silicon-edged scraper. If you’re just starting out, the Kitchen Set 11 is a solid base for your cook kit.
The whole line is full of useful pieces. If you spend a lot of time outside, or have ever obsessed about your spice rack, you know how useful the weirdest little trinkets can be. The liquid containers, four-compartment salt and pepper shaker, the oil bottle and the scrubber will definitely find their way into my personal kitchen kit.
Other stuff to put in the bin?
I keep extra fuel for my main stove and a small canister burner and fuel cans in the event of a failure. I also keep sanitation supplies like soap, hand sanitizer, and Lysol wipes with my kitchen stuff to clean my hands and my kitchen equipment as necessary. Paper products like towels and toilet paper are also a good idea to have on hand. Trash bags, ziplocks, and tin foil are all also invaluable. Don’t forget your spice rack!
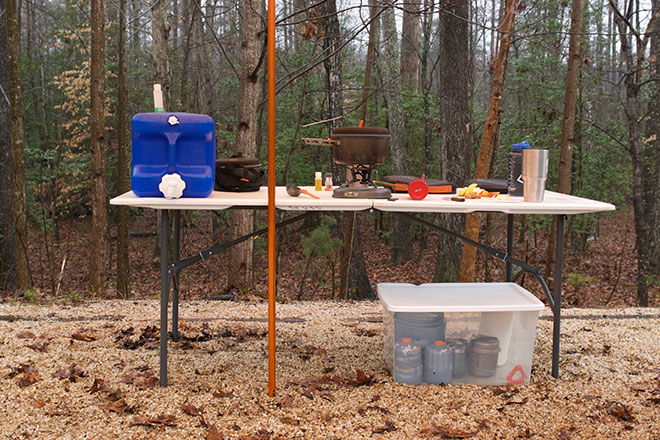
Food and Water Storage
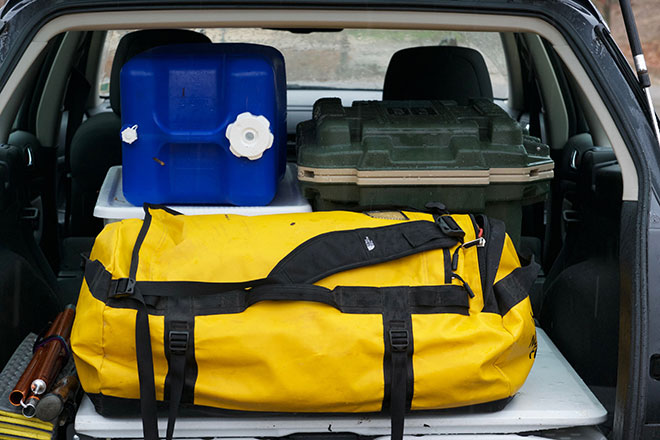
We’ve already done a solid rundown of coolers (thanks, Frank!) so all I’ll say here is that I’ve enjoyed all the Pelican products I’ve ever had. It works great as a cooler, as a seat, and as an anchor as you can see here. I’ll agree with the census on the handles though—they function great, but create a lot of dead space around them when loading the car.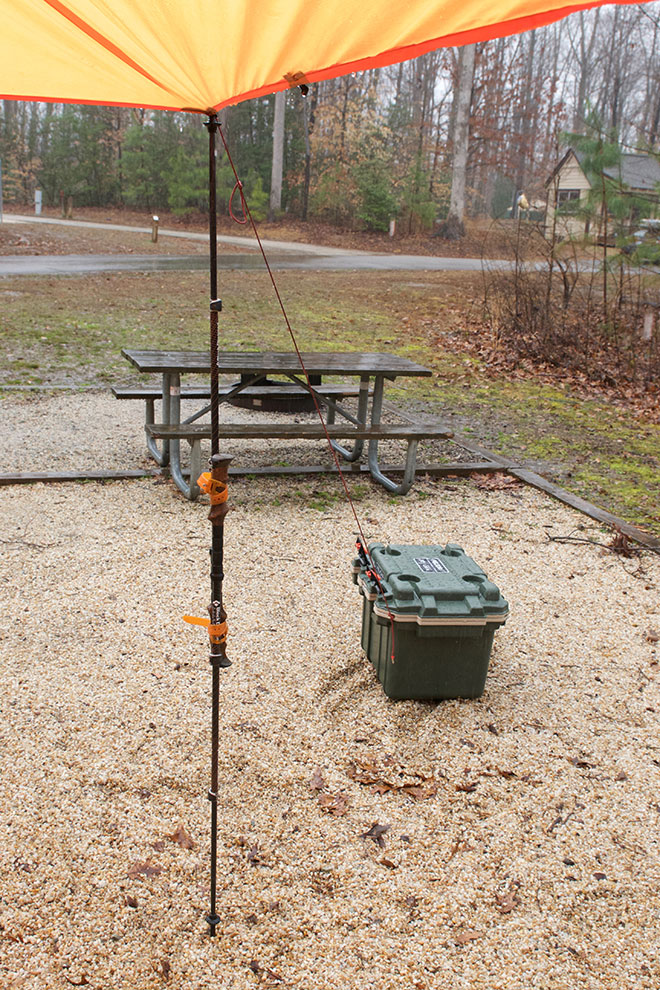
For water storage, I’ve been using these Reliance Aqua-Tainer cubes for a while. They’ll develop issues with the threads on the lids, and the spigot valve doesn’t always thread directly downward, but these are small inconveniences for an affordable product that just needs to hold potable water. Replacement parts are also readily available.
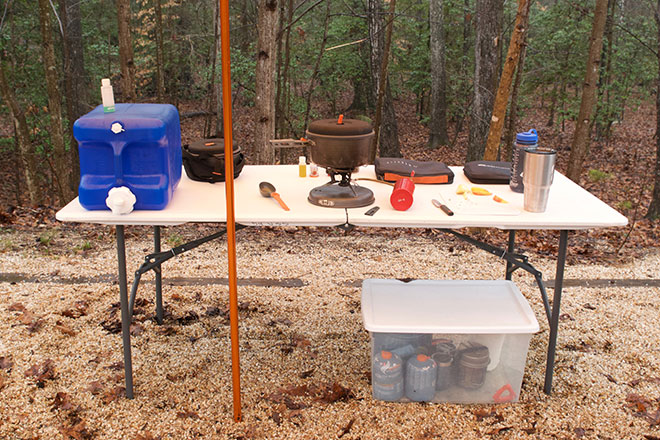
That’s a good start for now—you can certainly get away with less, and I often do, but most folks should be good to go from here. If you’re interested in getting a little closer look at how I set up a typical developed campsite, I tossed up an Instagram story on my page. Comment below with your must-haves, and let me know if you’d like to see more specific outdoor-related content in the future.
Happy trails!
Enjoyed this article? You might like these too:
Packing 101: How to Pack for a Backpacking Trip


 Carry Awards
 Insights
 Liking
 Projects
 Interviews
